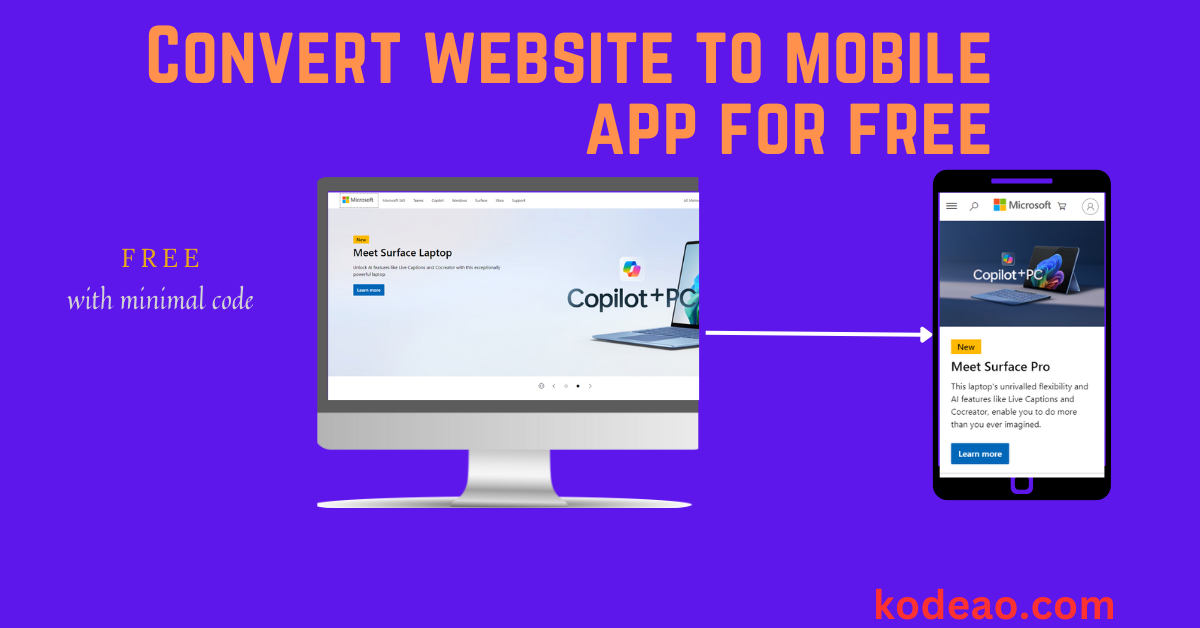
In today’s mobile-driven world, having a mobile app is crucial for the reach and accessibility of your website. If you have a website that you want to make available as an Android app, the process is relatively simple using Android Studio. In this guide, we’ll walk you through the step-by-step process to convert a website to a Mobile app using Java in Android Studio for free with minimal coding.
Prerequisites
Before we begin, ensure you have the following:
- Android Studio installed on your computer. You can download it here.
- Basic knowledge of Java and Android app development.
- The URL of the website you want to convert into an app.
Step 1: Set Up a New Project in Android Studio
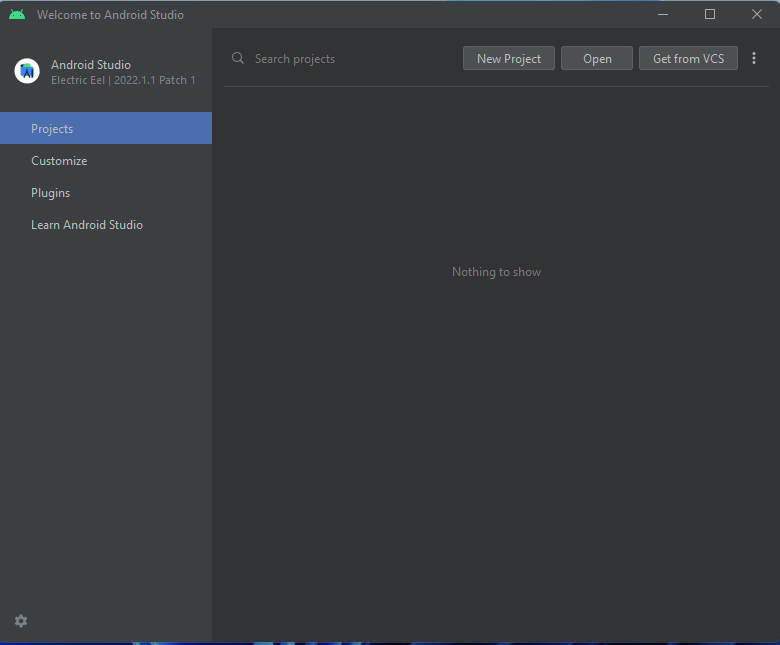
- Open Android Studio and click on “New Project”.
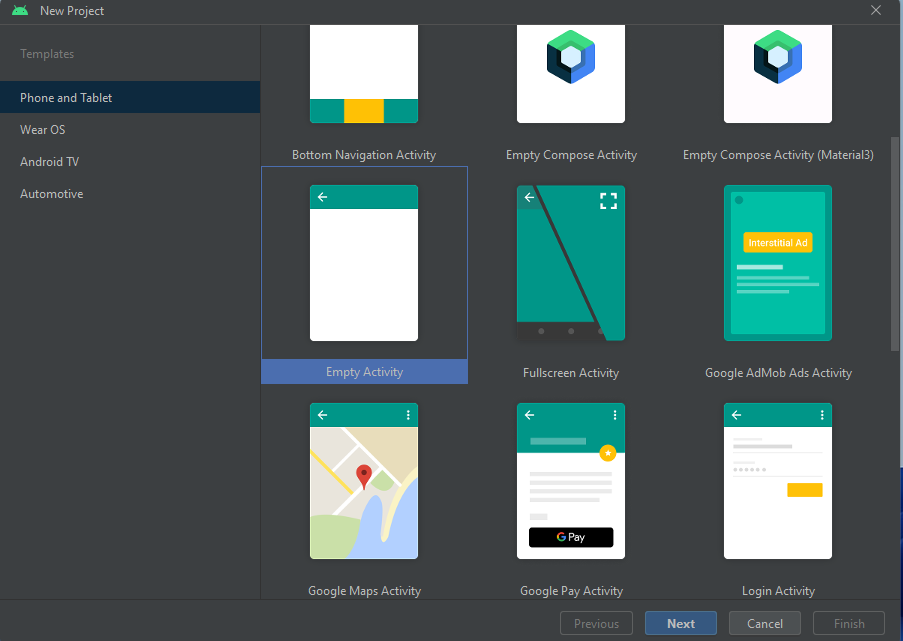
2. Select “Empty Activity” and click Next.
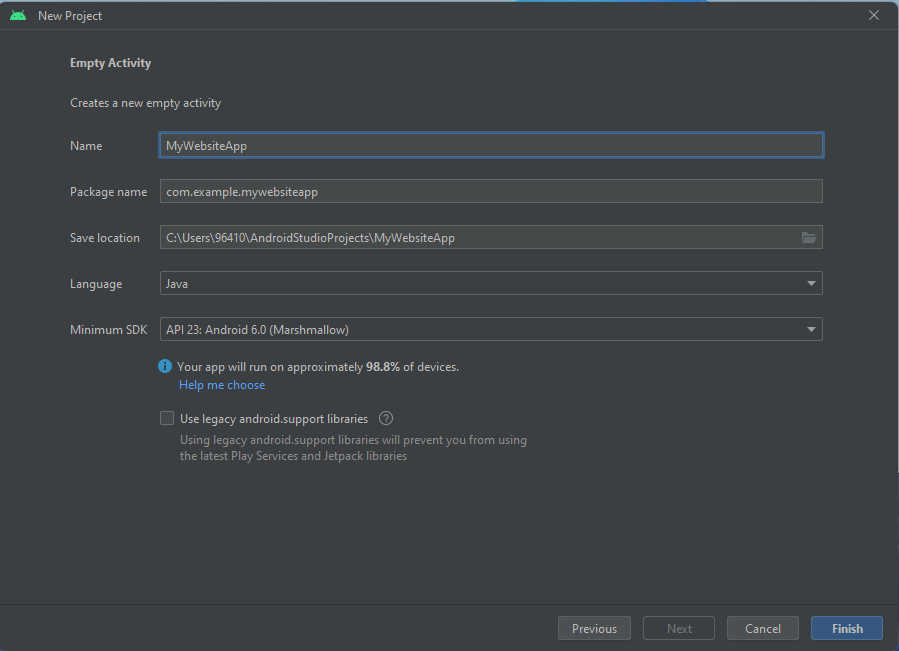
3. Enter the Name of your app (e.g., MyWebsiteApp).
4. Choose the Java language and set the Minimum API level as per your requirement.
5. Click Finish to create the project.
Step 2: Add Internet Permission
For the app to access the internet and display your website, you need to add internet permission to the AndroidManifest.xml file.
- Open
AndroidManifest.xmllocated underapp > src > main. - Add the following permission inside the
<manifest>tag:
<?xml version="1.0" encoding="utf-8"?>
<manifest xmlns:android="http://schemas.android.com/apk/res/android"
    xmlns:tools="http://schemas.android.com/tools">

    <!-- Add the INTERNET permission here -->
    <uses-permission android:name="android.permission.INTERNET"/>

    <application
        android:allowBackup="true"
        android:dataExtractionRules="@xml/data_extraction_rules"
        android:fullBackupContent="@xml/backup_rules"
        android:icon="@mipmap/ic_launcher"
        android:label="@string/app_name"
        android:supportsRtl="true"
        android:theme="@style/Theme.APP_NAME"
        android:usesCleartextTraffic="true"
        tools:targetApi="31">
        <activity
            android:name=".MainActivity"
            android:exported="true"
            android:label="@string/app_name"
            android:theme="@style/Theme.APP_NAME.NoActionBar"
            android:configChanges="orientation|screenSize|keyboardHidden">
            <intent-filter>
                <action android:name="android.intent.action.MAIN" />
                <category android:name="android.intent.category.LAUNCHER" />
            </intent-filter>
        </activity>
    </application>

</manifest>
Step 3: Design the Layout
Now we need to create a simple layout to display the website using a WebView.
- Open the
activity_main.xmlfile located underres > layout. - Replace the default
ConstraintLayoutwith aWebView:
<?xml version="1.0" encoding="utf-8"?>
<RelativeLayout xmlns:android="http://schemas.android.com/apk/res/android"
    android:layout_width="match_parent"
    android:layout_height="match_parent">

    <WebView
        android:id="@+id/webview"
        android:layout_width="match_parent"
        android:layout_height="match_parent" />

</RelativeLayout>
This will add a WebView that covers the entire screen of the app.
Step 4: Load Your Website in the WebView
Now, let’s configure the MainActivity.java file to load your website in the WebView.
- Open
MainActivity.java. - Add the following code to load a URL in the
WebView:
package com.example.application_name;

import android.os.Bundle;
import android.webkit.WebSettings;
import android.webkit.WebView;
import android.webkit.WebViewClient;
import androidx.appcompat.app.AppCompatActivity;

public class MainActivity extends AppCompatActivity {
    private WebView webView;

    @Override
    protected void onCreate(Bundle savedInstanceState) {
        super.onCreate(savedInstanceState);
        setContentView(R.layout.activity_main);

        webView = findViewById(R.id.webview);
        webView.setWebViewClient(new WebViewClient());

        // Load your website URL here
        webView.loadUrl("https://www.example.com"); // // Replace with your website URL

        // Enable JavaScript if needed
        WebSettings webSettings = webView.getSettings();
        webSettings.setJavaScriptEnabled(true);
    }

    // Handle back button to navigate through web pages
    @Override
    public void onBackPressed() {
        if (webView.canGoBack()) {
            webView.goBack();
        } else {
            super.onBackPressed();
        }
    }
}
In this code:
- We create a
WebViewobject and configure it to load a website. - The
WebViewClientensures that links and redirects open inside the app instead of an external browser. JavaScriptis enabled for websites that require it.
Step 5: Handle HTTP URLs (Optional)
If your website uses HTTP instead of HTTPS, you may encounter the net::ERR_CLEARTEXT_NOT_PERMITTED error. To fix this, allow HTTP traffic in your AndroidManifest.xml:
<application
    android:usesCleartextTraffic="true"
    ... >
Alternatively, you can create a network security configuration file to allow HTTP traffic for specific domains.
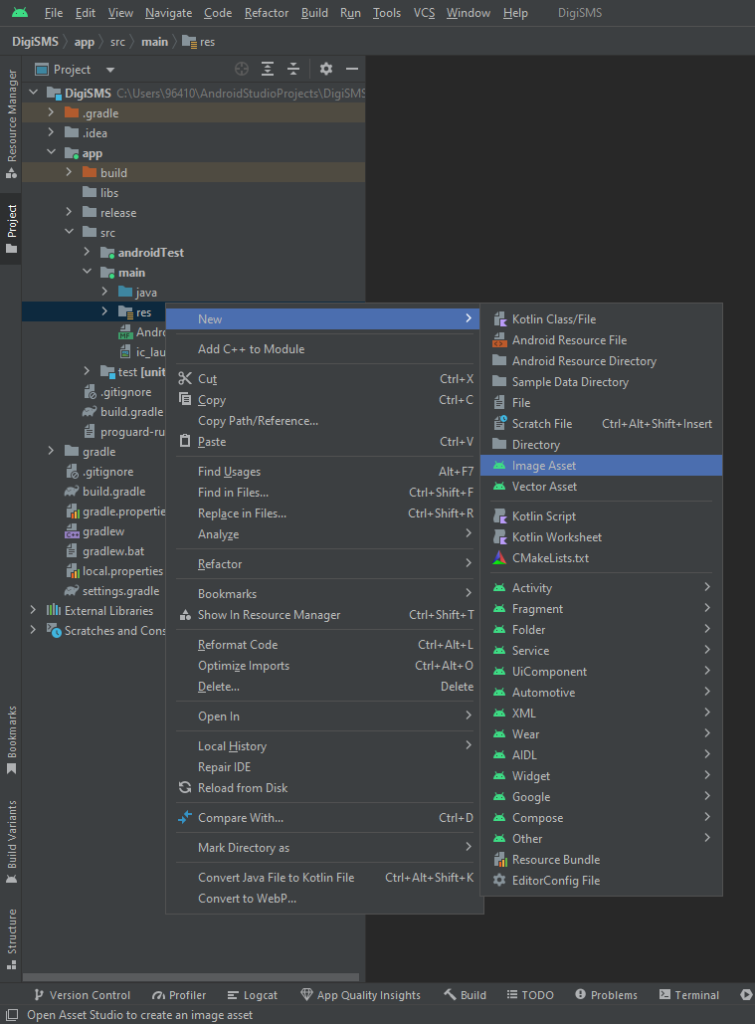
Step 6: Customize Your App Icon (Optional)
To make your app look professional, change the default Android icon:
01. Right-click on res > New > Image Asset.
02. Select your icon and configure it for different resolutions.
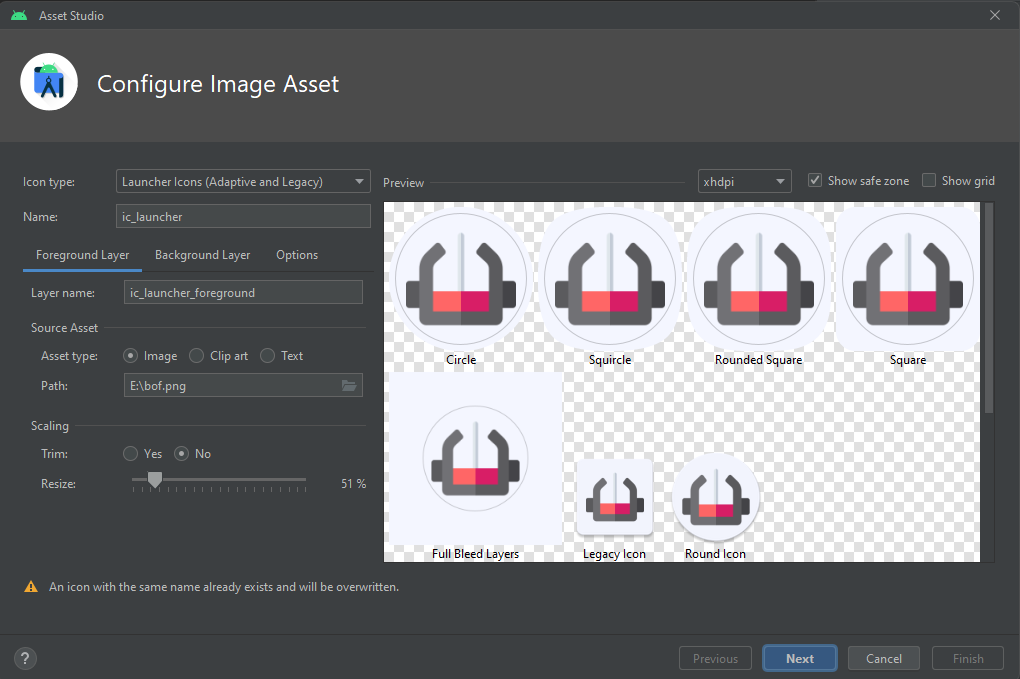
03. Click Next and Finish.
Step 7: Build the APK
Once everything is set up, it’s time to build the APK.
- Go to Build > Generate Signed Bundle / APK.
- Select APK and click Next.
- Follow the prompts to create a keystore if you don’t have one, or select an existing keystore.
- Select the Release build type and click Finish.
- After the build process completes, click Locate to find the generated APK.
Step 8: Install and Test the APK
- Transfer the APK file to your Android device.
- Open the APK on your device and allow installation from unknown sources if prompted.
- Test the app thoroughly to ensure your website loads and functions as expected.
Conclusion
With these simple steps, you can convert a website to a mobile app using Android Studio and Java. This approach is perfect for websites that do not require extensive native functionality. With a WebView, your website can gain the reach and usability of a native Android app, allowing users to access your content directly from their home screens.
By following this guide, you’ve taken your first step into mobile app development. Happy coding, and

